


You can now install the ComodoPositive now Sectigo SSL Certificate obtained through AfeesHost all by yourself via SSL/TLS Manager in your cPanel account. To successfully install it, this is what you need to do:
Pre Requirements:
You need to have the nameservers (NS for short) updated for the domain you are going to install SSL on – as it is important that the domain resolves to a server. You will find the nameservers (NS) in the Welcome Email we sent you along with all other details pertaining to your hosting account.
Once you have NS updated, log into your cPanel account.
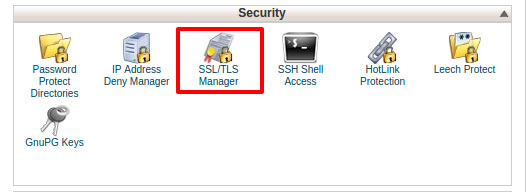
Under the Security section, check if SSL/TLS Manager is available and activated. If not, contact AfeesHost Support Team and have it enabled.
Generating the Private Key:
The first step in requesting for the SSL cert is, you need to generate the Private Key. This is the key which builds the communicating link between your server and the SSL cert provider.
Note: Keep in mind, for each and every SSL cert you want to get, you have to generate the Private Key
Once you are in cPanel, click on SSL/TLS Manager
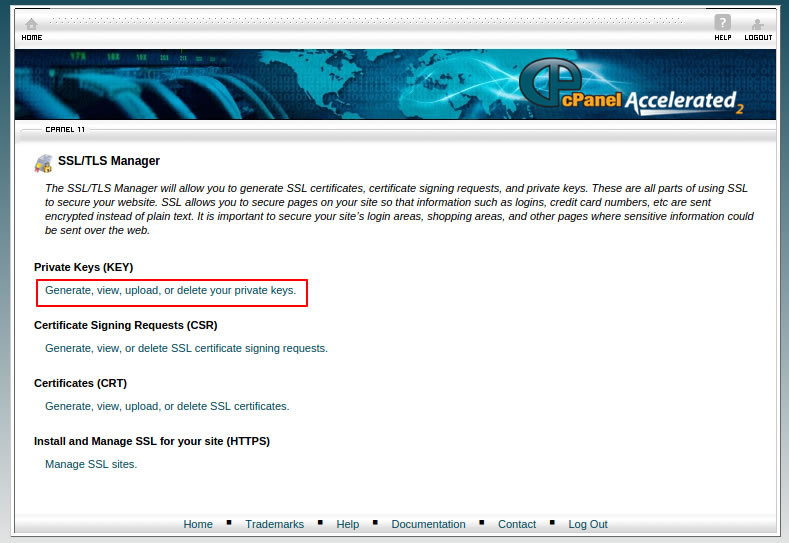
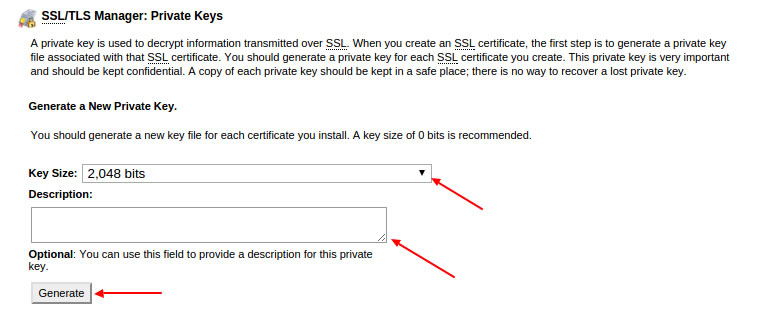
Under Private Key, click on Generate, view, upload, or delete your private keys.
-
In key size field, choose: 2,048 bits
-
The Description, it’s an optional field. You can either leave it empty or fill in with the related domain you are going to generate the private key for. Adding a sensible description will help you keep track of as to why this private key was generated. Once you are happy with the entries, click on Generate button to generate the private key.
When the key generates, you need to copy the entire code (click on the code > Ctrl + A then Ctrl + C) and click on Return to Private Keys button. You should see the key you created listed in the small table.
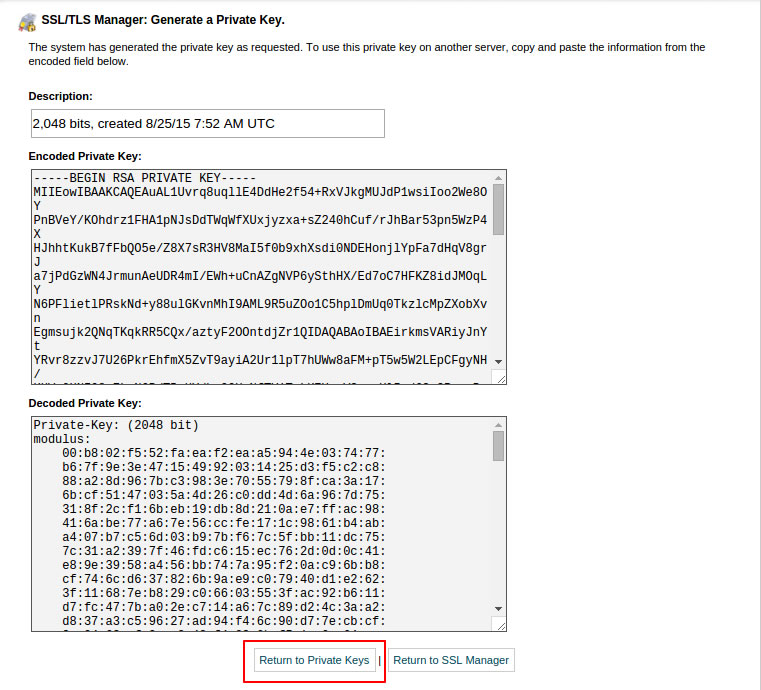

Under the Upload a New Private Key section, you can paste in the copied key in step 5 and click on Save. Now click on Return to SSL Manager

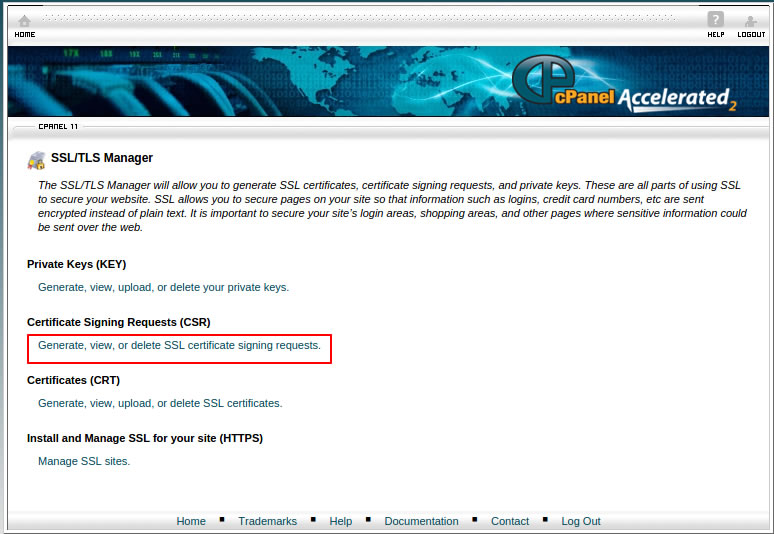
Generating the Certificate Signing Request (CSR)
From cPanel > click on SSL/TLS Manager
Click on Generate, view, or delete SSL certificate signing requests under Certificate Signing Requests (CSR)
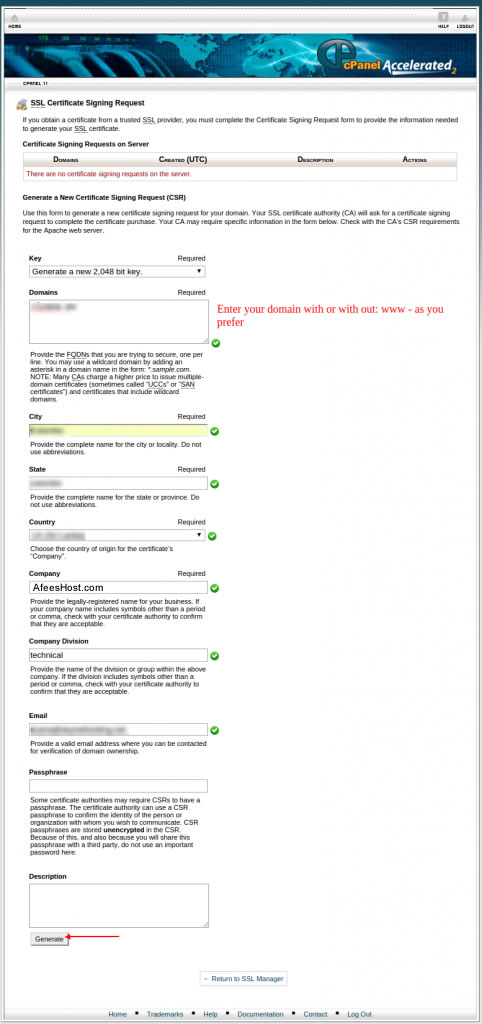
Enter the details correctly as shown in the image. Finally, click on Generate button to generate the CSR.
Once you obtain the Encoded Certificate Signing Request (CSR), create the hostmaster@yourdomain.com email (replace your domain.com with your actual domain) in your cPanel account and open a ticket to our Technical Support department ( https://www.afeeshost.com/clients/clientarea.php ) > paste in the CSR you just generated along with the related domain you are purchasing the cert for, your hostmaster@ email ID with password and request for the ComodoPossitve SSL certificate.
Obtaining the SSL Certificate
When the SSL certificate has been provisioned from our end, you will be updated about it through the same ticket you submitted.
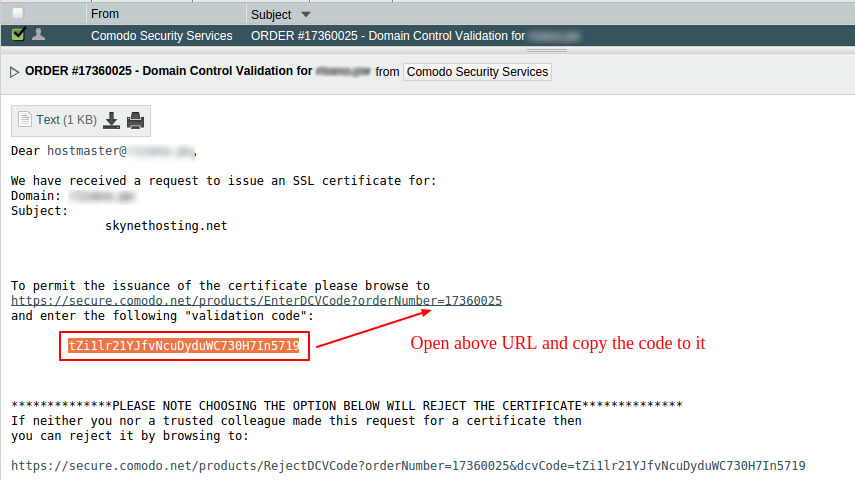
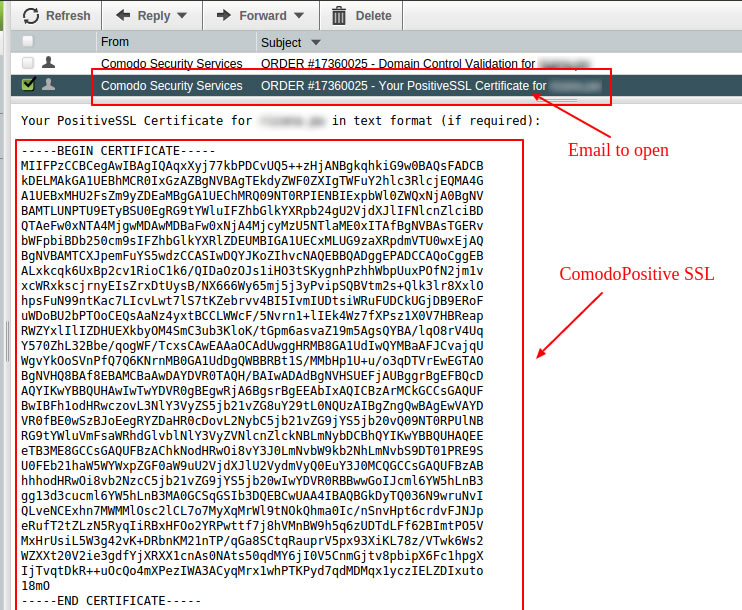
Now log into your hostmaster@ webmail account using port: 2095 and choosing any one of the given mail software applications > go to the inbox.
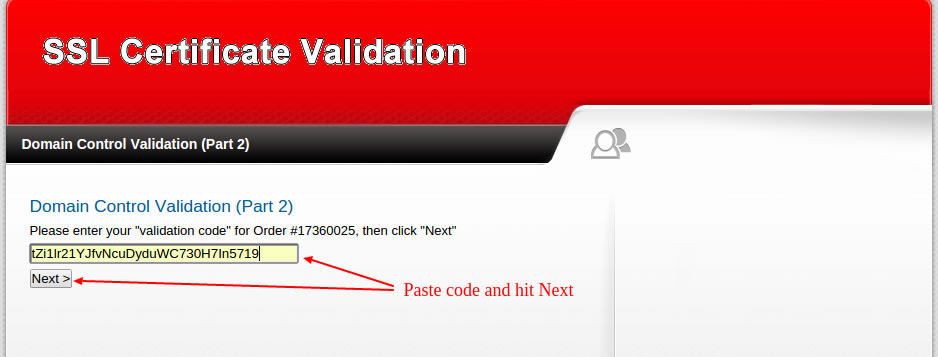
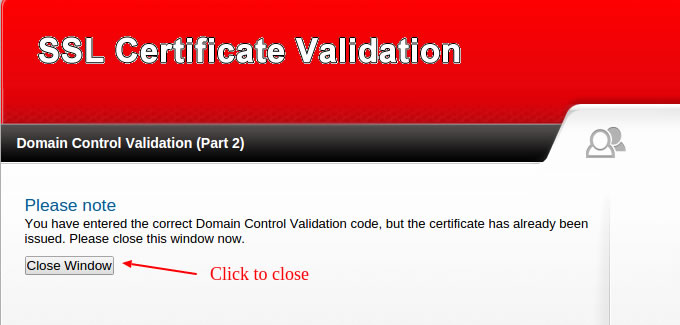
You will see the Domain Control Validation email for the domain. Click open the email and enter the validation code in the given URL
Wait for a couple of minutes to receive the SSL cert to the same hostmaster@ email. Once you receive it, copy from Begin Certificate to End Certificate (including the two lines) and proceed to the installation of it.
Installing the SSL Certificate
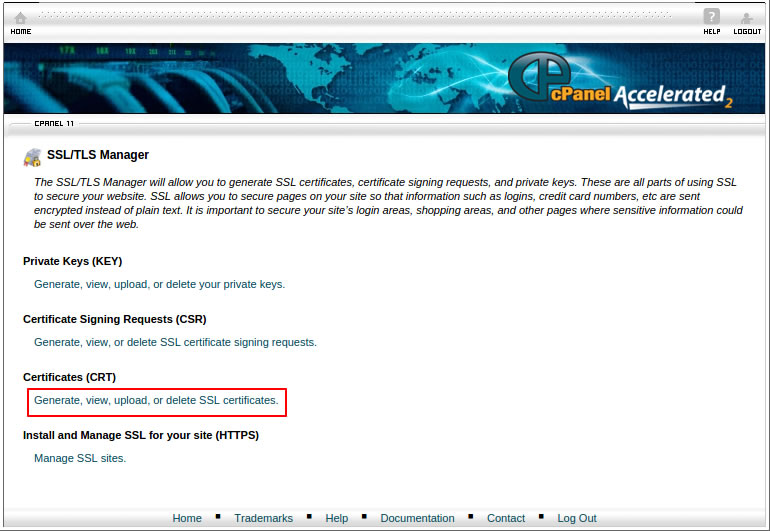
When you receive the SSL cert over your hostmaster@… email ID, cert, return to your cPanel > SSL/TLS manager and click on Generate, view, upload, or delete SSL certificates under Certificates (CRT) and paste in the provided SSL cert. Hit on Save Certificate.

Activating the SSL cert
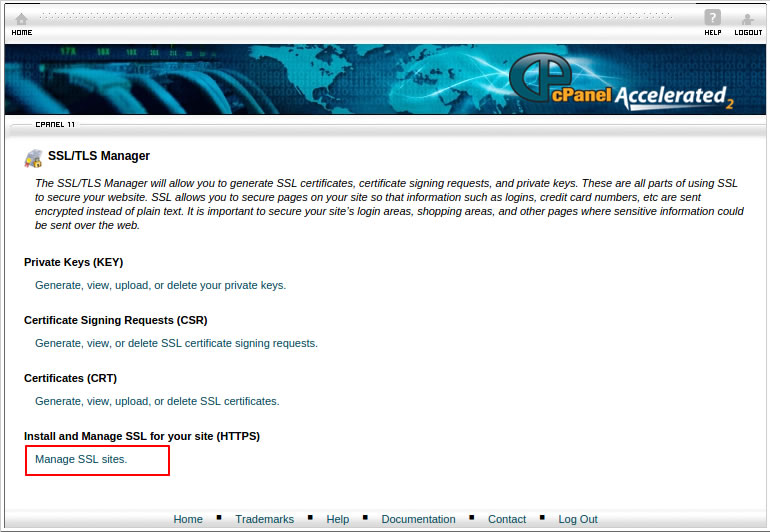
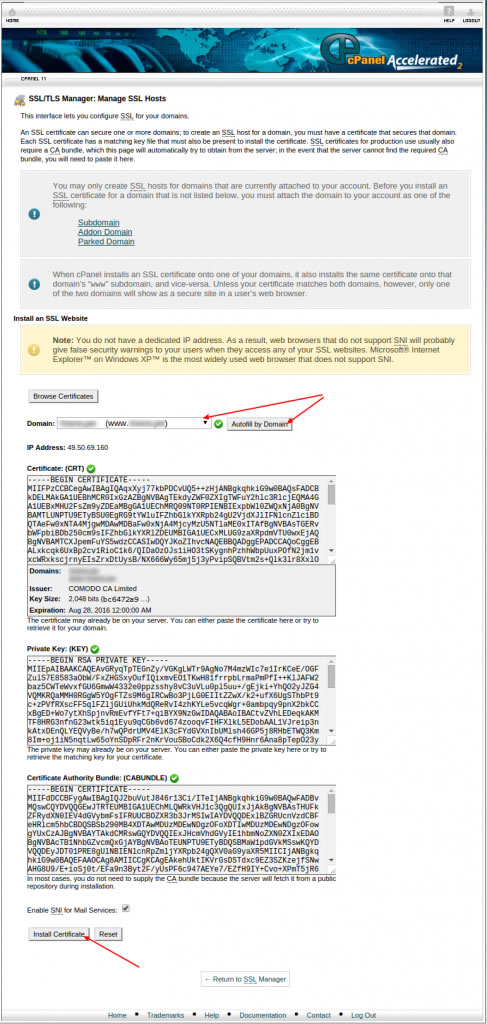
Time to activate the SSL cert you purchased. In cPanel > SSL/TLS manager click on Manage SSL sites under Install and Manage SSL for your site (HTTPS)
For the Domain field, click on the drop-down and choose the related domain you are about to install the certificate. Next hit on the Autofill by domain button so the cert and related private key will fill in automatically.
Finally, click on Install Certificate button.
A pop-up screen will appear when your SSL Certificate installation is successfully done, just click on the OK button to complete the process.
